Elixir on Raspberry Pi 2 (using Windows)
Goal
Deploy an example Elixir application with the Nerves-Project to a Raspberry Pi 2, using an Ubuntu guest in VMware Player on a Windows host.
Synopsis
We are using the Nerves-project, buildroot and Ubuntu in a virtual machine to create a SD-Image, which contains the default application, blinky.
Motivation
After seeing this talk from Garth Hitchens on Embedded Elixir in Action I wanted to try the Nerves project to deploy an Elixir application to my Raspberry Pi 2. Yet, as I’ve blogged before I’m using a Windows machine and most of the build tools (for Raspberry Pi) are using Linux.
Prerequisites
We will need to install different software to our computer, therefore I assume you have the rights to do so. Also we need disk space (around 15 Gigabytes). Because we are using a virtual machine it does not hurt to have a beefy computer. More RAM+CPU = Better.
Steps
There are several steps needed to complete our goal, most of them require some Linux usage. Bear with me, we will make it! (Also have a look at Linux for Dummies)
Install VMware Player (10 Minutes)
On your Windows Computer do:
We will install a Hyper Visor on our computer. A Hyper Visor enables you to have an operating system in your original operating system (without the risk to destroy your computer).
There are several Hyper Visor solution available. On Windows 8 and 10 the Microsoft HyperV software is available (and installed by default, I think?). In general I would go with the defaults, but I deactivated HyperV for various reasons in the past (no 3d virtualization being one of the most pressing reasons) and choose VMware Player.
After installation of VMware player download the Ubuntu 14.04 (64bit )LTS server image (or the desktop image, I don’t care).** So far, 32 WONT WORK!**
Create a virtual machine (5 Minutes)
On your Windows Computer do:
Start VMware player and hit “create a new virtual machine”. In the wizard window choose the “Installer disc image file (iso)” option and select your previously downloaded Ubuntu server image.
Hit next and go along with the defaults* until it finishes.
- If you are constrained on the disk size, you can reduce it from 20 Gb to 10Gb. I tried it with 5Gb but failed on downloading all the needed tools.
Install Ubuntu 14.04 LTS (30 Minutes)
In the virtual machine do:
Start your virtual machine (green arrow) and go along with the installation defaults. I changed some aspects which I will highlight now:
  * Language: I'm using German as system language and as keyboard layout.
  * Encrypt File System: I politely declined. I couldn't care less on this build machine. Also this is in theory a minor performance drain.
  * Packages to install: I checked the OpenSSH box
Let the installation finish. It will take some time and ask questions in between instead on the beginning. So have an eye on that. As a side note. Remember username and password. We need it. For convenience use KeePass 2 or similar software.
Get IP Address (1 Minute)
In the virtual machine do:
Finally we can log in. For later usage we need the IP address. After you logged in, enter
ifconfig
in the terminal. This will bring up the network interface configuration. We need the IP address of the interface eth0. In my case the line looks like
inet Adresse:192.168.62.129 Bcast:192.168.62.255 Maske:255.255.255.0
We only need the address: 102.168.62.129 in my case.
Install Nerves (10 Minutes + 45 Minutes of waiting…)
In the virtual machine do:
I installed everything in my home folder, but fell free to do so where ever you like (but remember it later on :-P)
Update your package sources:
sudo apt-get update
The following code is provided by the Nerves-Project:
sudo apt-get install git g++ libssl-dev libncurses5-dev bc m4 make unzip

# If your system is 64-bit, also run this
sudo apt-get install libc6:i386 libstdc++6:i386 zlib1g:i386 gcc-multilib

#Create a caching folder
mkdir ~/.nerves-cache  # optional
At this point the Nerves tutorial could be more on the point. They state “… Change to the nerves-system-br directory…” yet there is no such folder. To fix this clone the Nerves-project/nerves-system-br project from Github!
sudo git clone https://github.com/nerves-project/nerves-system-br.git
Now we can change in the nerves-system-br folder:
cd nerves-system-br
Now we can follow the tutorial on the nerves-project Github page along again:
make nerves_rpi2_elixir_defconfig
And now to kickstart the future “real” builds: Lets make a dry run to cache all files (this may will take a while):
make
This takes around 45 Minutes.
Using Nerves (10 Minutes)
The tutorial states one has to source the environment. This sets some variables and is needed every time one brings up a new console
cd ~/nerves-system-br
source ./nerves-env.sh
For testing I cloned the blinky example from Github
cd ~
sudo git clone https://github.com/nerves-project/nerves-examples.git
change in the new folder and in the blinky directory
cd nerves-examples/blinky
Now the magic can happen:
make
This will create a file _images/blinky.fw
*.fw is the file format for fwup (don’t worry it is already installed). After some research (and lots of help by Frank Hunleth and Garth Hitchens I We figured out the correct command:
fwup -a -i _images/blinky.fw -d _images/blinky.img -t complete
Using this command you create we create a Raspberry Pi image file (_images/blinky.img)
Get the image (5 Minutes)
On your Windows Computer do:
The resulting image is located in your virtual machine at ~/nerves-examples/blinky/_images/ .
To access that folder we need to download the folder from the virtual machine to your Windows computer. You can access the folder via WinSCP if you opted in for the OpenSSH package before:
Open WinSCP (if installed; otherwise: Download, Choco Package) and create a new connection. Computer name is the IP address we saved before. Username and password are your credentials from the virtual machine (I told you to remember it!).
You will be presented with two explorer views. The left side is your computer, the right side is the virtual machine, already in the home folder of your user.
If you cloned the nerves-examples.git in the home folder as I suggested, you can easily follow the path. On the right side click through the folders ~/nerves-examples/blinky/_images/ until you find your file, which is called blinky.img. Copy the file to your computer, for example on the Desktop.
“Burn” the image (15 Minutes)
On your Windows Computer do:
To burn the image we need a tool which creates the file system from our downloaded image. Follow the tutorial on RaspberryPi.org.
Fun (Countless hours)
On your Raspberry Pi do:
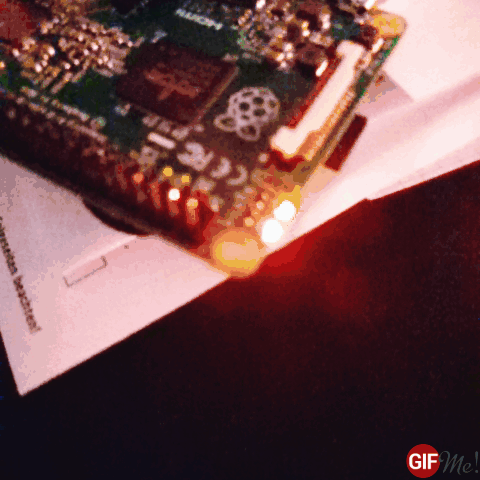
Insert the SD-Card in your Raspberry Pi and power it on. Depending on your setup, something should happen! For example the blinky example lets you blink the LED, the demo example (should, didn’t work for me) let you connect via ethernet.
History:
- Update 23.12.2015: Added hint for 64bit after @mdsebald mentioned it
- Update 22.12.2015: Fixed the “Get the image” part
- Update 22.12.2015: Fixed the tutorial
- Update 21.12.2015: Marked the tutorial as broken